Tuesday, April 17, 2012

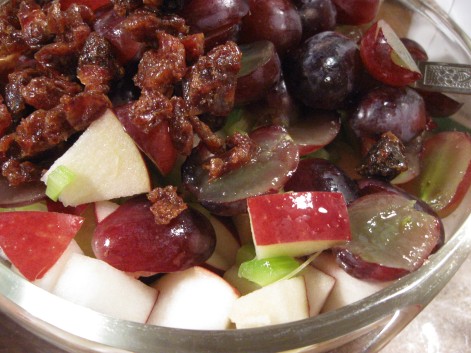
Aunt Ann's Waldorf Salad

For my 16th birthday, a friend gave me a copy of “With Love, From My Kitchen”, which is basically a blank yet organized cook-book, to be filled with the favorite recipes of friends and family members. Since then, I have been slowly gathering the classic family favorites, as well as begging friends to write one or two of their favorites in for me; I like the idea of the recipes being written in their own handwriting, leaving a bit of their personality in my keepsake cook-book.

One recipe that is surrounded by wonderful memories is Aunt Ann’s Waldorf Salad. She wasn’t my aunt, but like most people who visit older people with their nieces and nephews, I called her aunt. We played games on the living room floor with the kids and scrabble at the dining room table, and she served this salad with dinner. I’d never had it before and managed to work up the nerve to ask her for the recipe. (I was still in my most dreadful shy stage back then.) I looked up traditional Waldorf salad, and I’m afraid this has been dressed up a bit, and sweetened with whipped cream. I can’t quite imagine I would enjoy plain mayo as the dressing after eating this.

Aunt Ann’s Waldorf Salad

2 C chopped red skin apples

1 1/2 tsp lemon juice

1/4 C chopped celery (TINY, in my opinion, is the way to go.)

1/4 C chopped walnuts

1/4 C raisins or chopped dates (dates all the way! Raisins are normal. Dates are extraordinary. Remind me to share Nan’s Date Cake recipe.)

1/4 C red grapes, halved

1/2 C whipped cream or cool whip (give or take a little… taste it and see what you like.)

1/4 C mayonnaise

ground nutmeg

In a medium bowl, toss apple with lemon juice. Stir in celery, nuts, dates and grapes. In a separate bowl, fold together whipped cream and mayonnaise. Spread dressing over the top of the apple mixture (I believe this helps keep the apples from browning if you keep it overnight) . Sprinkle lightly with nutmeg. Cover and chill 2-4 hours, or overnight. To serve, fold dressing into the fruit mixture.

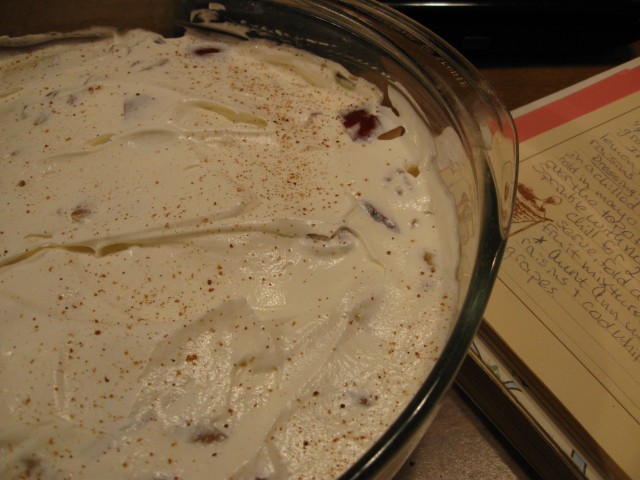
This badly lit picture of the dressing-covered salad is the last picture I have. I meant to take pictures of it all mixed together, but I made it for our dinner on Resurrection Sunday, and somehow… we ate it all. I think we might have been licking the bowl, but perhaps that’s an exaggeration. Anyway, people really love eating this stuff.

(P.S., as long as you don’t get carried away with it, this recipe is HCG P3 approved.)

Thursday, April 12, 2012

HCG P3 Breads

What IS this title all about? Has she gone mad? Is she using secret code for something mysterious? Well perhaps, and sort of. I couldn’t tell you what HCG stands for if my life depended on it, even though I used the HCG protocol for the last month and a half. I’d have to google it, but instead, I’ll let you!

P3, now, is Phase 3, the part where a person gets to eat food again. Of sorts. Just not sugar and starch. That’s right. No cake. No cookies. No potatoes. NO PASTA. WHAT?? Ah well, life goes on. And quite deliciously, I must admit. Admittedly, I am scouring the internet for flour-less bread and pastry substitutes, and I’ve found a few that, while they would never fool anyone into thinking they are what they stand in for, they are tasty and satisfying in and of themselves. Was that a run-on sentence? Almost?

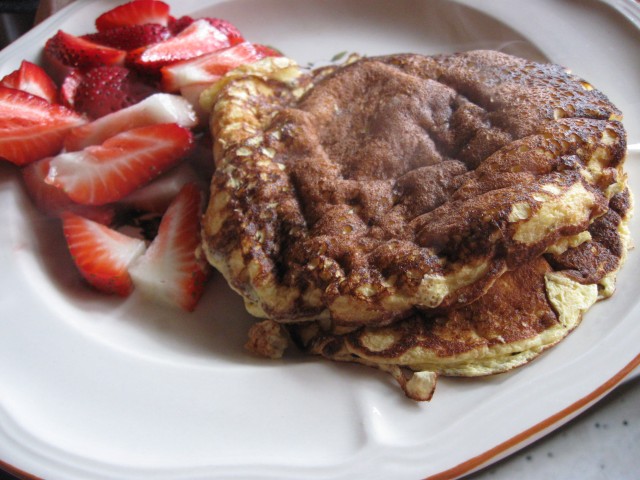
Back to the point. The first day I was allowed to eat Anything but Sugar and Starch, I made myself some flour-less pancakes. Cream cheese, eggs and sweetener, whizzed together with my new immersion-blender (remind me to expound upon that little gadget sometime – I’m in love.) fried up like pancakes and topped with strawberries, etc.

They LOOK like pancakes. They are not easy to flip at all, even in a non-stick pan (I tried it several ways) but in the end they make a very satisfying little stack of creamy faux pancakes.

These are YUMMY, people. And basically… you’re eating two eggs and strawberries for breakfast. Healthy pancakes! Woohoo!!

The next recipe I tried (which I have no pictures for) was the Cauliflower Pizza Crust. During my round of HCG dieting, I sat through FIVE, PRECISELY FIVE pizza parties without touching a crumb. Just sipping my cup of spiced tea and telling myself over and over that it was going to be worth it. So, indulging in anything remotely resembling pizza was a lot of fun.

Two things: A friend mentioned squeezing the water out of the cauliflower after cooking it. I either skipped over that in the instructions, or it’s not there. Either way, it’s not horrible if you don’t do this, but better if you do. Second, between the mozzarella in the crust and the mozzarella on top, it was saltier than anyone needs it to be. Does anyone ever make a lower-sodium mozz? I have toyed with the idea of making my own, and it is more and more appealing lately.

The third HCG-friendly bread-substitute that I find I enjoy is Cloud Bread. And I have no decent pictures of it, so I STOLE one to make this post prettier. If I am taken away in shackles, know that it was all for you, beloved reader.

This stuff is interesting. You separate eggs, beat the yolks with a bit of cream cheese, beat the whites until still with cream of tartar and them fold the two together and bake into little buns. Cool and place in a zip-lock bag overnight, and by morning they are transformed into what is texturally a hybrid between white bread and angel food cake and… clouds. The name is so perfect. And they are so light and curiously delicious you will probably eat all six of them in two minutes, so make a double batch. Better yet, make a double batch and mix in some cinnamon into half the batter for dessert cloud bread.

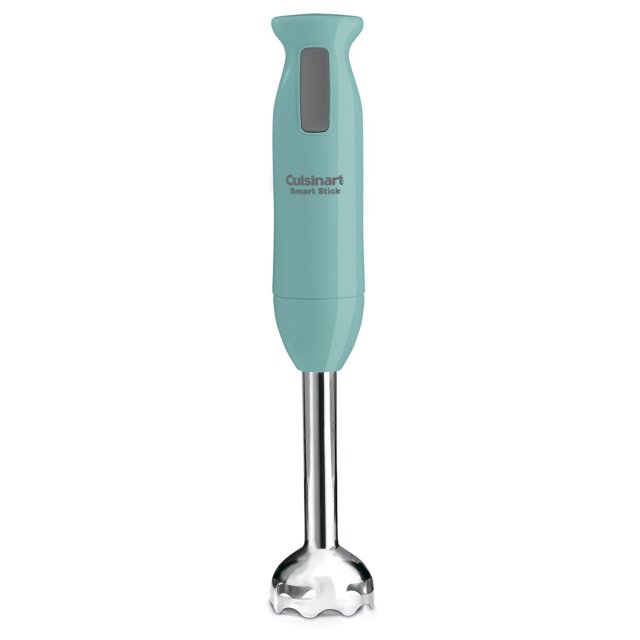
Cuisinart SmartStick

I’ve wanted an immersion blender ever since I first worked as a waitress in a local restaurant. I witnessed the wonders that were worked behind the closed doors of the kitchen and knew that someday I would have one of my own. Recently, I’ve been on a kitchen-appliance-browsing kick, and found exactly what I was looking for in the way of immersion blenders.


The Cuisinart SmartStick. It has excellent reviews. The entire blender shaft easily detaches for easy cleaning without the remotest chance of electrocuting yourself. And the blades on this baby are sharp. I’ve made tomato soup, blended up batter in seconds and I know not what all, and one day soon I’ll see how it stands against chunks of frozen fruit in making smoothies.

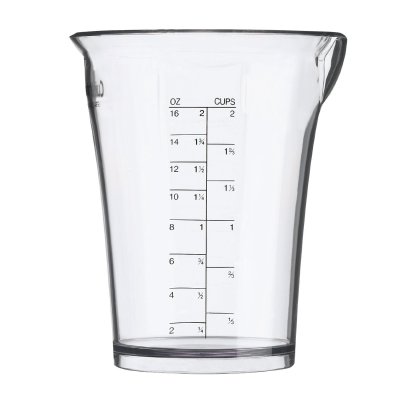
It comes with a “Mixing Beaker”, which is really quite handy when you are mixing up small batches of something-or-other. No need to get a giant bowl dirty. For a small kitchen, it does quite a lot of what a regular blender would do, without hogging counter space. And it’s infinitely quieter than a regular blender, which is invaluable for my family; my dad is working 3rd shift right now, and when you really want a smoothie but can’t make one lest you wake him… a quiet blender is a dream come true. And as far as features goes… it hasn’t any. There’s a switch that turns it on and off. That’s all. And who needs more? Well, other than the lovely selection of pretty colors. That was the hardest part of the decision to buy, for me. Pink? Apple Green? I settles on turquoise, and in person it has a sort of retro look about it. For $30, this is a great small appliance to have.

Saturday, March 31, 2012

Baked Sweet Potato Fries


Yuuuuuuuuuum. Okay people, first off, get the normal idea of 'french fries' out of your head right now. These are not white potatoes, to begin with, and they are not fried, secondly. There is no crispy exterior and fluffy interior. Instead, what we have are tender, sweet, almost maple-y slices of sweet potato, complimented beautifully by a little salt and savory paprika. Stick form, so you can eat it with your fingers, but you won't be dunking these in ketchup. Oh no. We do one better here. Raspberry sauce. Late last summer I made these with sweet potatoes and raspberries straight from the garden. It doesn't get much better than that!

  • Olive oil, for tossing
  • 5 sweet potatoes, peeled and sliced into 1/4-inch long slices, then 1/4-wide inch strips.
  • Salt and pepper to taste
  • 1/4 tsp garlic powder, more or less
  • 1/2 teaspoon paprika

Preheat oven to 450 degrees F.

Line a sheet tray with parchment. In a large bowl toss sweet potatoes with just enough oil to coat. Sprinkle with your seasonings and toss again. Spread sweet potatoes in single layer on prepared baking sheet, being sure not to overcrowd. Bake until sweet potatoes are tender and golden brown, about 20 minutes, turning once. Let cool 5 to 10 minutes before serving.


For the raspberry sauce, I kind of wing it. For your sakes though, I will try to be more specific and hope I'm right.

  • 1 cup fresh or frozen raspberries
  • 3 tablespoons sugar, or to taste
  • 1 tablespoon corn starch mixed with enough water to look the consistency of cream.

Mash the raspberries and cook in a small saucepan until it begins to bubble. Strain through cheesecloth or a sieve to remove all the seeds. Return to saucepan and add sugar and corn starch. Bring to a simmer and let thicken slightly; this should only take a minute. Remove from heat. It will continue to thicken as it cools. This doesn't make a large amount, as I am the only member of my family who wanted to try this! Next time I think I'll add a splash of orange juice or some zest perhaps. That sounds marvelous.

Friday, March 30, 2012

Giant Meringues


I know, I know, right after a post on low-carb intentions, I go and show you all a sugar-laden treat. My apologies. I was going through my picture files and found that I had never posted this recipe, having meant to simply months ago! I made these for a girls' night and they were a big hit. Light and delicate, fun swirls of color, easy to flavor according to your preferences, and they look impressive!


Giant Meringues
based on a recipe from BBC Good Food

4 egg whites
1 C sugar
1 tsp corn starch
1 tsp white vinegar
1 tsp vanilla extract
1 tsp citrus zest
(I used lemon and orange and colored accordingly)


  1. Heat oven to 275 F. Line 2-3 baking sheets with parchment.
  2. Beat the egg whites until stiff . Add roughly half the sugar and the vanilla, corn starch and vinegar and beat until mixture becomes very thick, firm and shiny. Add the remaining sugar and whisk again until thick, firm and shiny.
  3. Gently fold in 1/4 tsp yellow or orange food coloring (or your own choice), careful not to over-mix and lose the beautiful swirls of color. Use a large spoon to swirl the airy rainbow-clouds of meringue onto the parchment paper, about 1 1/2 dozen. They spread slightly as they cook, so leave space between them.
  4. Bake for 30 minutes at 275, then reduce the heat to 225 for another 30. (Optionally, you can make about 8 HUGE meringues and bake for two intervals of 45 minutes each. Warning: When I say huge, I mean it.)
  5. Remove from the oven - they should peel easily away from the parchment - and cool on a wire rack. Can be made up to a week ahead and kept in an airtight container, or frozen for up to 3 months, between layers of parchment, in an airtight container.

Thursday, March 29, 2012

Foodie Update


It's been a while since I've had much to post about, a result of being on the HCG diet for over a month. Hey, I'm down 20 lbs, but lean meat, one vegetable and one fruit per meal doesn't leave a whole lot of room for creativity. I'm excited to say that I have one week left before I can start eating almost normally again! Still low-carb... but I like that challenge. I am looking forward to sharing healthier recipes and meals with you. I still love my scones and bread of all types, but the reality of obesity and diabetes in my family is forcing me to take a step back from indulgence and find ways of making delicious, health-conscious meals, and creative ways to get myself to eat - dun dun DUUUUUUUUUUHN - vegetables. I am learning to eat more vegetables than before, but it's not an easy of terribly fun transition.

I also have some new and exciting cook-books to try out as soon as I'm released from the bonds of a strict diet. Look for reviews in the future!